**************************************
INTRODUCTION
Q: WHO is this system designed for?
A: It was designed to help the bottom 25% of SL golfers, myself being one of those, learn some of the metrics of SL Golf, play better golf, i.e. produce lower scores. This system assumes you are using the True Golf system and its HUDs.
Q: WHAT is this system designed to do?
A: It is designed to accept information about a given COURSE, HOLE, PLAN, and SWING, accept WIND data, and then ADVISE the SL Golfer and give 1 or more choices on which: CLUB, POWER, BACKSPIN, AIM, and SWING vs CHIP to use. It can easily adapt to quick changing pin-locations.
It is intended to be a training device to help the low-end golfers more intuitively estimate and perform the mental gymnastics necessary to make better informed decisions on their golf swing by familiarizing them with metrics that accompany different situations and challenges encompassing club, distance, elevation, wind, hazards, roughs, aims, and backspin.
Q: WHEN was it designed?
A: It started about 2 years ago
Q: WHY was it designed?
A: I used to make crude, cryptic, notes for holes like below:
Hole #1 – 107 m to Flag
Dr – 85% – to fairway
Dr – 85% – to flag
putter 6m to flag – tilts right so angle left from below
Hole #17 – 3W 80% = 1 or 0 BS
Hole #18 – DR 85% = 0 BS
I wanted a more systematic, consistent, organized, method to approaching certain, what i call, TROUBLE HOLES. So this system was not meant to be used on EVERY HOLE but just on those holes that have proved challenging and/or troublesome. You probably wont need it on holes where you consistently get birdies or eagles. (1 or 2 under par).
Below is presented a lot of information that may seem daunting. Know that we will walk you thru actual examples of how to use and implement the system that will explain and reinforce the data below. If you find yourself overwhelmed due to information overload, feel free to skip forward to the actual CASE STUDY #1, way below.
Q: CONCERNS- Is this going to take the ‘unpredictability’ out of SL TG/tools-based Golf outcomes?
A: No. There are several unknown variables that will still exist and persist that will affect the outcomes:
1 – WIND – Between the time it takes to enter the WIND speeds and the time you actually make your swing, the HEAD/TAIL WIND will have likely changed, relegating your entered wind-speed into the COACH HUD as being off and thus affecting the actual distance from the calculated expected distance.
2 – AIM – Adjustment to aim (left/right direction adjustments) is performed using WHOLE ticks based on club and left/right WIND speed. However the COACH HUD advises in PARTS of a TICK. So it is likely that the inability to adjust for a partial tick will adversely affect your outcome, especially over longer distances.
3 – GREEN – The slope and curvature of the green as it approaches the pin/hole will change based on pin-placement and is hard to gauge, depending on positioning.
4 – POWER – Sometimes your optimum POWER setting will be less than 100%, meaning that your TIMING might be off when trying to hit 75% or 50% or 25% as you might miss the mark ever so slightly.
5 – BACKSPIN – While BACKSPIN DISTANCE ADVICEs at 100% POWER for ALL THE CLUBS was measured using ACTUAL test-cases in a ZERO-WIND environment, powers less than 100, i.e. 75, 50, and 25, are only guestimates and have been calculated using a percentage method based on the 100% actuals.
6 – SL LAG – There will be occasions for unpredictable and unmanageable lag spikes that will affect the physics and thus, the outcome of your SWING, thru no fault of your own.
7 – 3-IRON/4-IRON – As of this writing, this system has not yet been updated to factor in the newly added 3-Iron and 4-Iron metrics, nor the DRAW/FADE effects. So those who encompass these 2 extra clubs will have an advantage over those strictly using the COACH HUD.
8 – APPROXIMATION – The MaximumDistanceFromTarget indicator on the *golfcoach notecard is set at 2 (meters) but can be changed. So your best ADVICEs will be an outcome of club, power, aim, backspin that fall within 2 meters of the target distance or pin/hole either before or beyond your target.. Chances are very unlikely that this will be 0 meters, So the predicted outcome will very likely be short of perfection.
9 – UNFAIRNESS to those not using the system – If this is of concern, then there will be a FREE course monitor tool that will register when any player has used this system for the current day for a given course. Anyone will be able to check it and see who has made use of the system for that given day. Also an ability to check for use during a tournament range-of-days so that their use of the system can be factored into your final decision of whether or not to allow their participation or golf scoring.
**************************************
There are 2 HUDs. GOLF COURSE and GOLF COACH.
******************************
TARGETS
This system is based around TARGETS. Two TARGETS determine a DISTANCE. An ADJUSTED DISTANCE accounts for ELEVATION and WIND. An ADJUSTED DISTANCE is what the system uses to decide how to ADVISE you as to what decisions to make when striking the golf ball with a golf club. An ADVICE consists of: CLUB, POWER, BACKSPIN, AIM, and choice of full-SWING or CHIP. You may likely be OFFERED more than one ADVICE to choose from. The system also relies on you supplying approximate anticipated WIND information to more accurately determine the ADVICE. TARGETS can be supplied using either or both Pro Golf SL Digest System HUDs.
******************************
WIND
Wind (Head/Tail) affects how much harder or softer you must hit the golf-ball, which factors into which club you use, power, and backspin combination. The cross-wind, (left-right) affects your aim or taps off of center either left or right in combination with club selection.
I want to preface how wind is calculated and how it should be taken into account. This system currently supplies SLWind information automatically when the WIND button is pressed. You can probably rely on the Head/Tail Wind calculation but the CrossWind (Left/Right) may leave something to be desired. You can also enter your own wind values, overriding the auto-supplied SLWind values, say when you are using b-Wind or g-Wind or another wind system. You can also enter a Wind Bias (advanced).
The SL wind in weather-vanes usually polls every couple of seconds. So in essence, wind-metric providers can always change between the time you calculate its value AND affect and the time you take actually make your swing. This variance is most apparent in the cross-wind. The head/tail wind often do not change that much to make a meaningful difference. So your aim calculations are up the gods, essentially. May you get lucky. This wait-time applies to SL-Wind and MAY at times also apply to, depending on how it changes and how the ball choose to obey its values, b-Wind or g-Wind or other wind systems.
******************************
PURPOSES
1 – GOLF COURSE HUD – Stores and forwards static information about courses and their holes. It uses MEASURES to create TARGETS.
It measures distances for HAZARDS between 2 markers OR between a position (HOME) and you the golfer (ME). You do NOT NEED to use the GOLF COURSE HUD but
it can keep you from having to continuously reenter the same TARGETS over and over again. You CAN enter TARGET information using only
the GOLF COACH HUD, but then you must GUESS-TIMATE the TARGET “DISTANCE” and ELEVATION.
2 – GOLF COACH HUD- Accepts information about your situation and your choices and makes ADVICE (club/power/backspin/swing-type/aim) recommendation(s).
GOLF COACH HUD is a Second Life HUD that you wear to help assist you, based on: a course, hole, plan, and swing number, and sometimes round, in choosing:
- the right club
- the right amount of power
- the directional aim (left vs. right)
- the amount of backspin, if any
- the choice of Swing or Chip
There are 3 categories of information. My Situation, My Choices, and My Results.
My Situation is static information about a given Course-Hole, like par, information about a given swing like distance, elevation, and wind, as examples.
My Choices are decisions you make about making a given swing, like: club-choice, backspin, power, aim, etc.
My Results document what happened after your swing, like in-the-hole, hazard, penalty, distance-left-to-hole, etc.
You enter information about a given course, hole, plan, swing # and it will make one or more recommendations. You also provide distance, wind-metrics and target-elevation.
There are 5 types of data presented.
1) Key:– These are: Course, Hole, Swing, Round. This data is data you MUST enter. They are preceded by a plus-sign (+) This identifies associated information about a given swing. Logging (saving) a recorded requires all 4 of these fields. Most other functions only require Course, Hole, and Swing Number.
2) Computational: These fields are the MAJOR fields you enter that are used in analysis. Examples: Target, Head/Tail Wind, Elevation, etc. These fields are preceded by an asterisk (*)
3) Calculated: This is information calculated based upon computational information and automatically supplied. Example: Wind Adj. (wind adjustment), Total Bias, etc. You do not and cannot enter this information.
4) Choice: These entries are fields you enter based upon your choice from 1 or more recommendations from the 6-Analyze/Advise step. Analyze will recommend items like: Club, taps, backspin, swing-type(swing or chip), and power. These entries are preceded by a hyphen (-). These fields are OPTIONAL but recommended. You SHOULD enter these fields after making your choice from 1 or more recommendations from the 6-Analyze process, so that they exist for future review, comparison, and analysis after logging the total swing. You use the 7-Results button to enter Results information, although as I said before, Results information is OPTIONAL.
5) Informational: This type of data is just for you to ponder and consider when making your swing decisions or when analyzing results, but is not used to make any type of calculations or recommendations. Examples are par, terrain, result, score, penalty, etc.
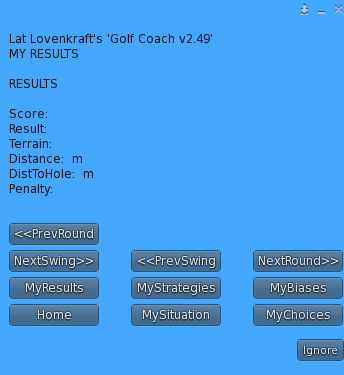

Main-Menu Screen Example:
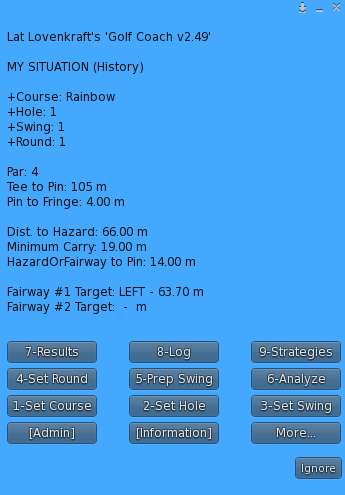
The My Situation screen button-names are preceded by a number. This number indicates the suggested order that the buttons should be chosen. Example: 1-Set Course should be the 1st button that you press, followed by 2-Set Hole, 3-Set Swing, etc. thru 9-Strategies which is optional and an advanced choice. NOTE: After creating a strategy from 9-Strategies button, you must use the 5-Prep Swing button to add a strategy that you created using the 9-Strategies button,.
***************************
GOLF COACH HUD MODES
There are 3 Golf Coach HUD Modes:
1) Normal [N]; = This is the mode you would use if you wanted to enter values without using the pre-defined values you created using the Course HUD
2) Course [C]; = This is the same as Normal mode in that you can enter or override values but it automatically populates existing values from the Course HUD for a given swing #
3) History [H]: = This changes the displays from currently entering new values to showing previously logged historical values from previous games / round for review.

There is an optional pop-up menu (on the right) that has extra buttons for faster short-cut access to commonly-used features. This side pop-up is optional and can be hidden using the Invisible/Visible toggle button accessed thru the Information button on the Main Menu (also referred to as the My Situation menu). You can also MINIMIZE the Golf Coach HUD by using the Blue minimize-button in the lower right hand corner.
You can Maximize it again by clicking on the smaller image of the GOLF COACH HUD.
You create a HISTORICAL Log record by using the 8-Log button and then using the CreateLog button. This will save all the My Situation, My Choice, and My Results information into one record identified by Course, Hole, Swing, and Round for later review and comparison.
Ok
So the most important piece of information we need is TARGET DISTANCE for each SWING Number. You can pull this piece of data from the GOLF COURSE HUD if you previously entered a Distance for this given: Course, Hole, and SWING (and ROUND if using History). Or, if not using the GOLF COURSE, you can directly enter this value using the GOLF COACH HUD. We will see how to directly enter this value later.
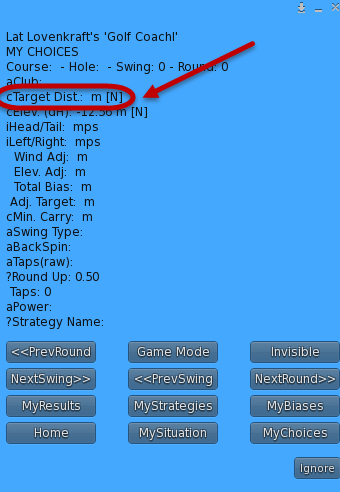
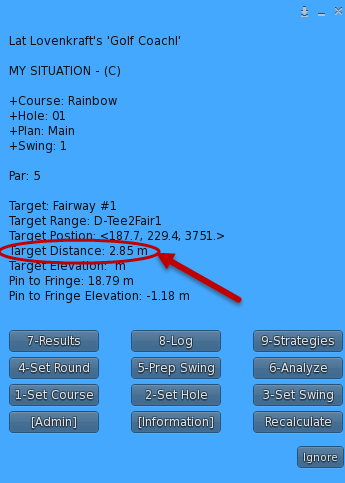
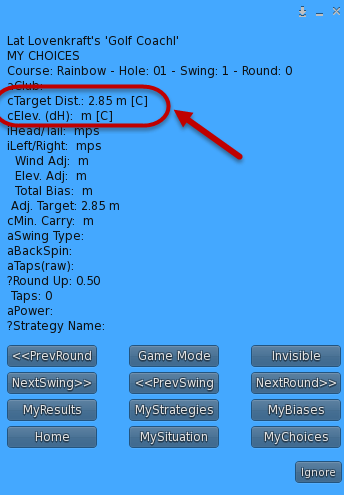
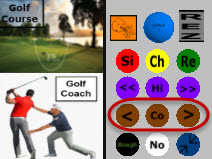
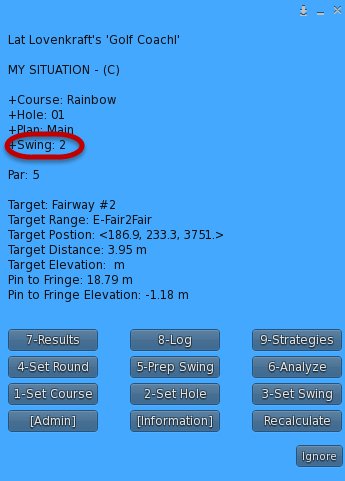
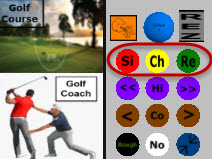
This next screen below illustrates how 3 buttons on the AddOn panel give direct access to the My Situation menu, the My Choices menu, and the My Results menu, respectively;
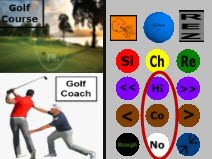
This next example below illustrates a quick method of changing Game Mode:
The “Hi” button changes to History Mode and loads in History that matches the current: Course, Hole, Plan, Swing, and Round. (Round is ALWAYS required for History)
The “Co” button changes the game mode to Course Mode. This means that every time you change Swings, the HUD imports existing matching Target/Elevation information from the ATTACHED Course HUD that matches the current; Course, Hole, Plan, Swing. (In this case, Round not needed and is ignored). The 1st time you press the “Co” button, it not only changes the game mode, but it also loads any existing Course information matching the current: Course, Hole, Plan, Swing. CAUTIION: Imports do NOT OVERRIDE any manual entries you may have previously manually entered for Target/Elevation.
The “No” is normal mode and works like “Co” except there are no imports. You are expected to manually enter the Target Distance and Elevation data. This is how it was done before the GOLF COURSE HUD was invented. I used to just guestimate both Distance and Elevation to my target before I created this system. When the target is the hole then this information, Target Distance, is automatically provided for you.
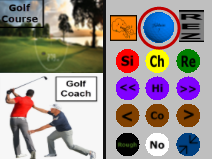
The blue Golf Ball icon is used to reevaluate the distance and elevation between your golf-ball’s current position and the target for that Swing No#, since it is very unlikely that your ball will hit your target exactly, but if it did, or maybe within 1 meter of your target, then you may not need to reevaluate because that target distance was already included in your sub-plan from the GOLF COURSE HUD. A Sub-Plan is just a series of from 1 to 5 predefined TARGETS with Distances and Elevations meant as a guide as to your intentions for a given Course, Hole, and Plan. There are 2 major Plans. MAIN and ALT. The MAIN plan is meant to be the low-risk, low-reward approach, i.e. avoiding a hazard but risking a sloping putt. The ALT is a high-risk, high-reward approach, taking on a hazard head-on, with a more favorable putting situation, i.e. avoiding putt slope. This is just an example of how and why you might use ALT vs MAIN plan. Feel free to reverse the MAIN and ALT plans if you so desire. It is just meant as a guide.
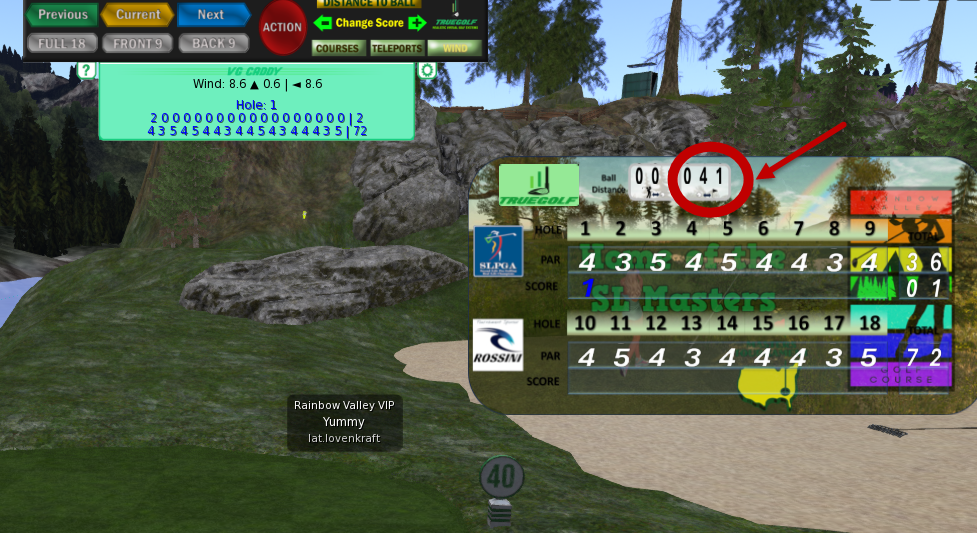
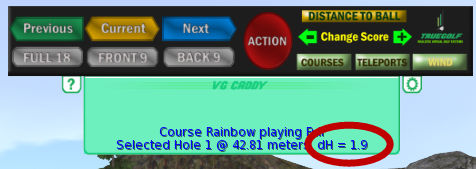
You can acquire the distances to the pin/hole, when it is your target, via the Rainbow Scorecard. I am not sure if all the other score-cards provide this information. You can also double-check the distance by using the hover-text value over the pin. Mine said 41.25. Close enough.
Using hover-text values I get 23.06 (pin-hole) – 21.08 (my golf-ball) = 1.98.
The easier way is to grab the value is using the TrueGolf Caddy HUD. See below.
**************************
REZ – REZZER
There is a REZ button on the Add-On. It makes it more convenient to ALIGN your AIMING Line to TARGETs that are NOT the PIN/HOLE by temporarily rezzing a marker that is not intrusive. Meaning that it rezzes:
1) The REZZER will not rez if there is no calculated PIN-POSITION. (Use ReScan button, if necessary)
2) The REZZER will not rez closer than 5 meters to the PIN-POSITION
3) The TARGET to REZ at must be less than 71 meters or less from the ball
4) The REZZER will NOT rez VISIBLE if anyone other than you is on the sim.
5) The REZZER rezzes as PHANTOM
6) The REZZER auto-deletes after 20 seconds.
*************************
PIN POSITION
Pin-Position (hole), like wind, is one of the things that purposely keeps changing to keep golf interesting and challenging. Pin-Positions often change for tournaments and sometimes arbitrarily change as often as every 10 minutes, assuming no-one is near them.
This system makes it convenient to update the pin-position easily with a few clicks in a few different ways. You must insure an accurate PIN-POSITION for each SWING that intends to aim for the PIN. (i.e. swings where the ball is within range and intends to aim for the hole, barring any intervening hazard(s).
Pin-Position is merely a metric to help gauge the DISTANCE to the PIN from the current position of the BALL. DISTANCE and especially ADJUSTED-DISTANCE, is how the ADVISEr/ANALYZER determines what resources to use for a particular SWING turn.
Pin-Position can be passed from COURSE-HUD to COACH-HUD via SUB-PLANS, having been scanned using the ScanForPin button in the COURSE-HUD, from off the [MEASURES] menu, recommended. The PIN-POSITION, along with other information, is sent to the COACH-HUD and specifically to the REZ icon to prevent unneeded REZ-zing-at-target close to the FLAG/PIN since the FLAG/PIN, itself, serves as the AIM-ing target.
Another method, for a given SWING, is to manually enter the DISTANCE by accessing the TARGET button from off the 5-Prep Swing main-menu. This TARGET actually is a DISTANCE. You would also enter the ELEVATION from this same sub-menu. We just learned how to manually access these values from the: SCORE-CARD (some) and the CADDY-HUD. Instead, we also learned how to find this information using HOVER-TEXT and a subtraction calculation.
And still another method is offered, assuming. There is a ReScanPin button off the 8-Log sub-menu. This will re-scan the existing hole, without having to renter the hole number/name, within 71 meters of the requested HOLE number for a matching PIN/FLAG.
*************************
PRELOADED GOLF TOOLS
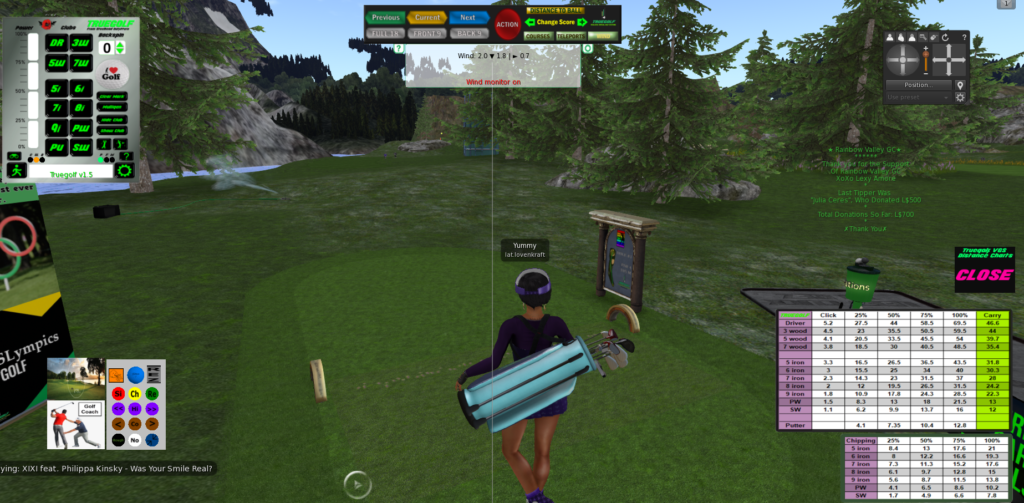
This is what is assumed you will have loaded as far as GOLF TOOLS are concerned. The TrueGolf HUD, The TrueGolf Caddy, The Aiming Line. The Golf Course and the Golf Coach. And, optionally, the TrueGolf VGS Distance Charts. We are going to use the RAINBOW course for our 1st case-study example. (UPDATE: A new PRO TOUR TrueGolf HUD has since been released that includes 2 new clubs. The 3-iron and 4-iron. It is intended for there to be an eventual upcoming update to this system to factor in the availability and effect of these 2 new clubs.)
***********************************
SUB-PLANS
A SUB-PLAN is a series of PRE-DEFINED TARGET-PAIRS meant to be executed in a specific order. Each SUB-PLAN is assigned to 1 of up to 5 SWING NOs. There are currently 4 PRE-DEFINED SUB-PLANS, #1 thru #4.
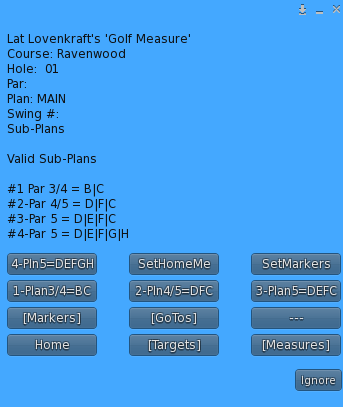
You can create your own CUSTOM SUB-PLAN using the TARGET-PAIRS MENU but that is more advanced and probably unlikely to be needed except in rare strategic approaches to a situation. If you do explore CUSTOM SUB-PLANs, there are 8 TARGET-PAIRS, A thru H. You can assign a single TARGET-PAIR, A thru H, to a given SWING NO.
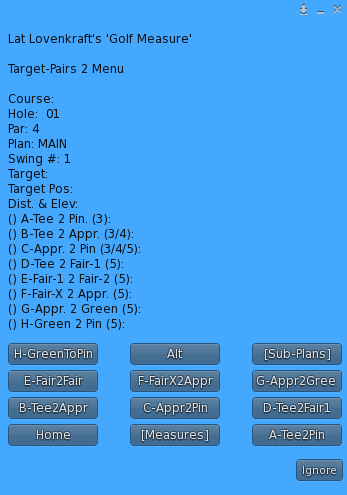
The SUB-PLANS are suggested PREDEFINED TARGET-PAIR collections that we think you would probably end up using 99% of the time. This saves you from always having to select individual TARGET PAIRS (CUSTOM) when you end up always using the same ones all the time. A SUB-PLAN automatically assigns the TARGET-PAIRS to the respective SWING NOs in sequence. Example: 2-Plan4/5=DFC would assign TARGET-PAIR D to SWING NO. 1, TARGET-PAIR F to SWING NO. 2. TARGET-PAIR C to SWING NO. 3. So, specifically, TARGET-PAIR D is meant to swing from TEE to FAIRWAY 1 and has a predefined DISTANCE and ELEVATION. That COULD get pre-populated into the COACH HUD. There is no readjustment necessary since it is the 1st swing no., assuming you start at relatively the same TEE position as you specified. If more precision is necessary or to calm you fears, you can always use the [GOTOS] feature in the COURSE HUD to position you more precisely for any pre-defined target, in this case, TEE-POSITION.
***********************************
TARGET-PAIRS:

***********************************
CASE STUDY #1 – COURSE HUD – Creating our 1st TARGET using the MEASURES MENU
Well that has been a lot of NEW information to absorb so now lets try and make sense, absorb, associate, and reinforce some of what we have read and learned by having a real-life situation. (It is suggested that you reposition the Golf Corse HUD to the LEFT, or somewhere out of the way, or else its keypad will be blocked by the Golf Coach)
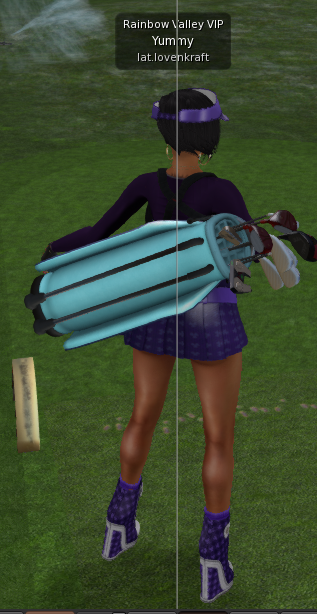
STEP #1 – Choose the RAINBOW GOLF LINKS group making it the active so you can use HUDS to rez things like ball, bag, markers, etc.
It will display as Rainbow Valley VIP.
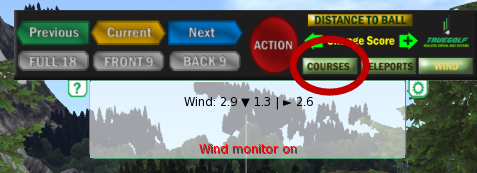
STEP #2 – Press the COURSES button on the CADDY HUD
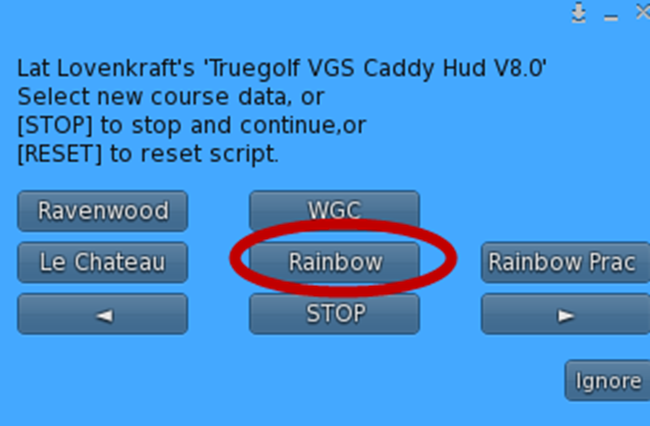
STEP #3 – Select Rainbow (it might be on 1st or 2nd page)
STEP #4 – Click on the COURSE HUD face
STEP #5 – Press RESET button, wait. Then Press COURSE button. Choose Rainbow for course.
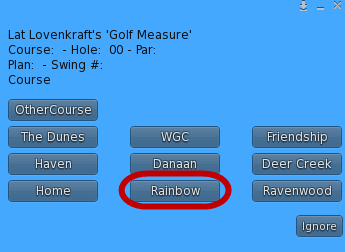
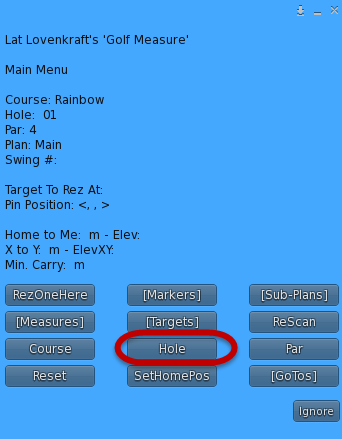
STEP #6 – Press HOLE from the MAIN MENU.
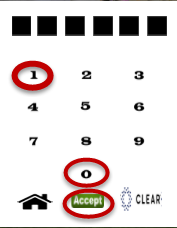
STEP #7 – Enter either 0 then 1 -OR- just 1 on the KeyPad, then press ACCEPT button. This sets our HOLE to HOLE #1
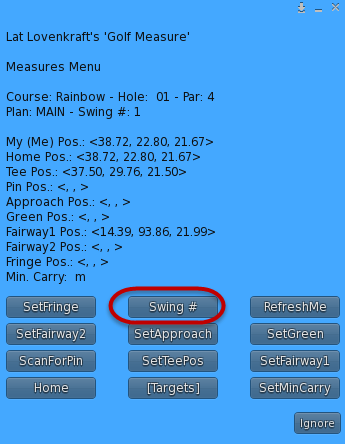
STEP #8– Press the [Measures] button then press the SWING # button. Enter 1 from the KeyPad.
STEP #9 – Press the PAR button on the same MAIN MENU then press 4 from the KeyPad.
***************************
Special Rule #1: The Rule of Approach
IMPORTANT: The APPROACH position can used ‘in place’ of EITHER a FAIRWAY or the GREEN. This means that instead of using position FAIRWAY 1, you can use the APPROACH position. Or it also means that instead of using the GREEN position, you can use the APPROACH position.
APPROACH is loosely defined as the position prior to aiming for the hole, EXCEPT in one condition. That condition is when a HAZARD is between the ball and the hole/pin which makes aiming for the hole/pin too risky, as in too little room for error before and/or after the hole/pin. So instead you aim for a safe, less-risky position on the GREEN instead of going for the PIN. In that case the ball at the APPROACH shot will NOT be aiming for the PIN but instead, aiming for some arbitrary spot on the GREEN in preparation for the next shot to aim directly at the hole/pin.
***************************
EXPLANATION: Plans and Sub-Plans – Mapping out your swings – Now is the time to plan your swings by denoting WHERE specifically you want your ball to land. What attack strategy do you want to take? A safe attack or a risky attack. Our PRIMARY GOAL is to BIRDIE every hole. But you may, at some points, wish to take a risk for an EAGLE that could cost you an extra stroke should you error, with you ending up getting a bogey )one-over-par) on the hole. Below is a diagram showing a risk/reward scenario that includes a HAZARD that you may or may not wish to gamble on. It also shows you which sub-plan you would use in each decisive scenario.
NOTE: The example below assumes a PAR 4 hole.
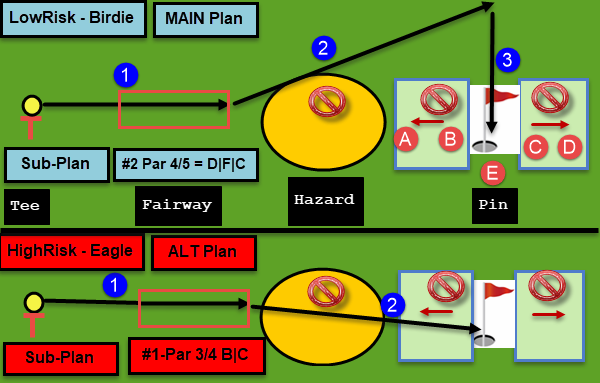
You are ultimately aiming for the E area. The fairway areas are considered to be inside the red rectangles.
So, if you are way short, you could land in the sand bunker (Hazard). Or if you clear the bunker but are still short of the level green area, (E), then you could roll back down a hill, B to A. Or, if you land too far on the backside of the hole, you will end up rolling down the hill from C to D. So it is risky but it is your only chance for an Eagle, or if you safely land in the E area, you could still make a birdie.
The legs of the subplan (LowRisk) are: #2 -Par 4/5 D|F|C:
(1) D-Tee2Fair1,
(2) F-FairX2Appr,
(3) C-Appr2Pin. [NOTE: FairX means it could be Fairway1 OR Fairway2, depending). In this case, it is Fairway1]
The legs of the subplan (HighRisk) are: #1 -Par 3/4 B|C:
(1) B-Tee2Appr
(2) C-Appr2Pin.
******************************************************
COURSE ATTACK CONSIDERATIONS
Official definition of an APPROACH SHOT:
Any golf shot played from the fairway with the goal of landing the ball on the putting surface is called an approach shot (whether the ball actually winds up on the putting green or not. (A bit different than how I use the term for this SL GOLF SYSTEM)
It is suggested that we consider ATTACKING a HOLE using a method that considers the EXPECTED SLOPE of the final tee shot.
Ok. So the thinking of how to decide where to line up for an approach shot is to consider OBSTACLES. We want to usually consider the WHERE, that has the fewest obstacles to overcome. #1 is HAZARD. #2 is ELEVATION. #3 and often overlooked is EXPECTED PUTT-SLOPE. We want to try and avoid or limit the effects of a slopping green terrain. This means we want to choose a path that, if we miss, will not veer off to one side or the other of the hole. This means we need to know ahead of time the general slope of the hole based on where we EXPECT to be if we are either going for a not-hole target.
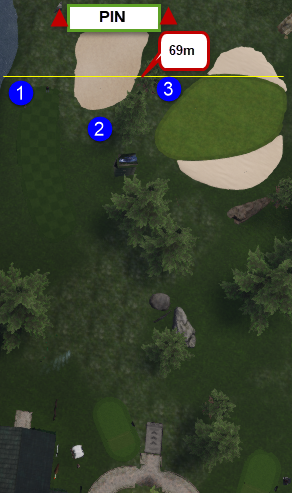
EXHIBIT #1
Above, we see an ACTUAL layout of a hole that we will prepare for in the following section.
First, we consider, off the TEE, near the bottom of the screen, the maximum distance we can hit our most powerful club, the DRIVER.
The YELLOW LINE is 69 meters. So we have 3 choices. 1, 2, and 3. Option #1 we can approach hole avoiding any hazard. There is a visible hazard between Option #2 and the hole called hazard #1 also a hazard (hazard #2, not visible in the exhibit #1 but visible below in Exhibit #2), between Option #3 and the hole. All 3 options must factor in Elevation to hole.
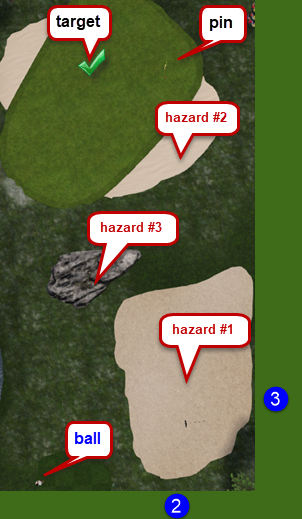
EXHIBIT #2
We decide to choose Option #1 which will end up just at the end of the GREEN. Our target is horizontal to the hole.
This works such that if we aim for the hole on our 3rd shot and miss, that we do not curve up or down, assuming there is no curve. We understand that
this is just ONE of FIVE possible pin placements. When the curvature/slope change based on pin-placement, you can store for later retrieval, the way that the
EXPECTED, approach will be affected by slope.
*****************************************************
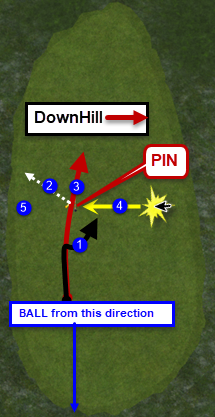
EXHIBIT #3
Assume the ball is on a fairway not seen in the picture above. (blue line).
The natural instinct is to aim straight for the hole. You can have 3 outcomes.
#1, black-line, you hit the ball too softly and you come up short and the ball veers down the hill aways.
#2, white-dotted-line, you hit the ball right at the pin, perfect aim, but a bit too hard, such that it bounces off in a random direction.
#3, red-line, you hit the ball too hard and misses the hole or goes over the hole and then veers downhill.
#4, So, ideally a conservative approach might be to aim for the YELLOW STAR, Then (#4 yellow line) if you miss you wont veer off and will still be lined of with a non-veering aim.
Also you are less likely to bounce off the pin if you hit it to hard since it is sloping back towards you. Worst case is if you over shoot you might end up at #5.
The thinking is avoiding a shot where when you miss, you curve away. Avoid trying to compensate for curve or slope to the hole. Just a conservative idea for beginners or those struggling.
******************************************************
AN ACTUAL COURSE DECISION-MAKING PROCESS
COURSE: Rainbow
HOLE: #1
PAR: 4
******************************************************
So, for our example, we will choose our MAIN plan and take the LowRisk attack plan.
STEP #10– Position yourself where you want to tee off. Then we are going to create our 1st TARGET.
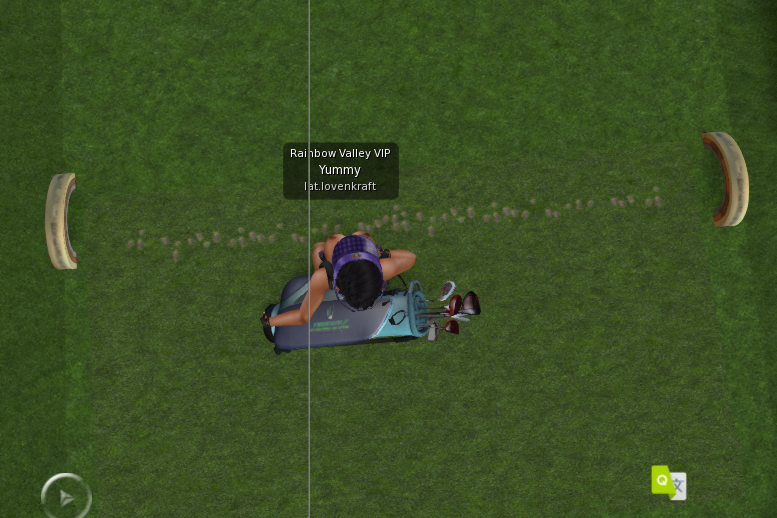
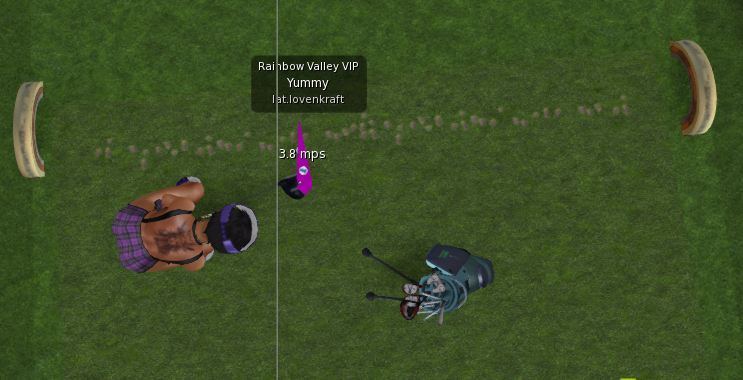
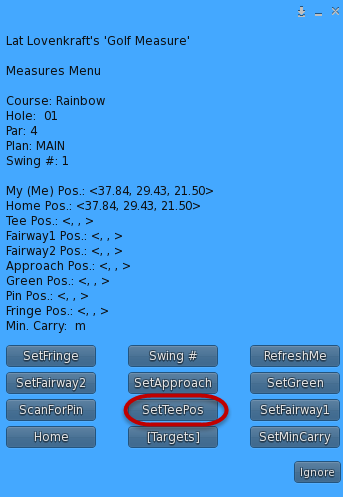
STEP #11 – Press the [Measures] button from the Main Menu, then press SetTeePos
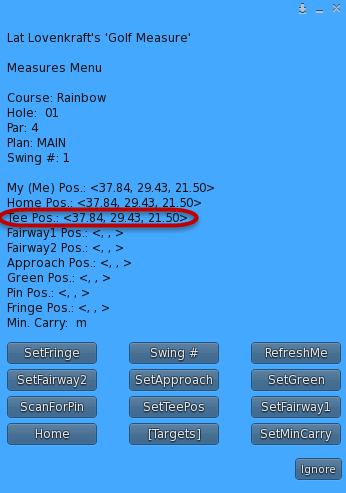
STEP #12 – Position yourself to where you want the ball to land after hitting it from the TEE. It should be within about 71 meters
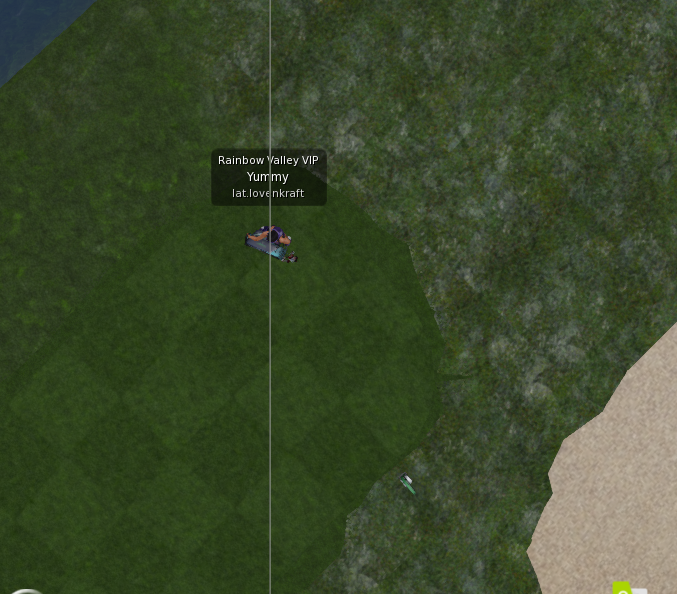
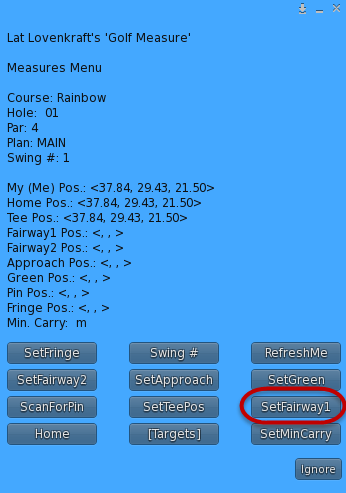
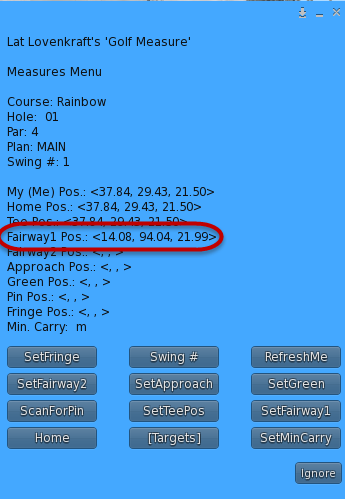
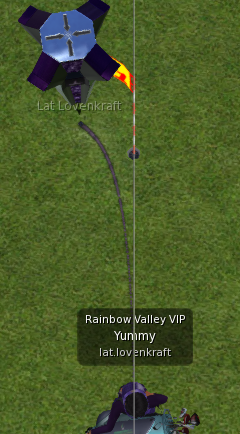
STEP #13 – Position yourself horizontal to pin/hole.
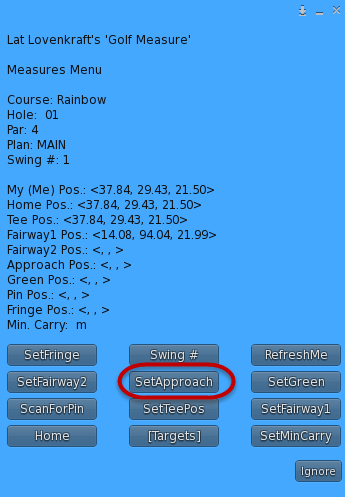
STEP #14 – Press the [Measures] button from the Main Menu, then press SetApproach
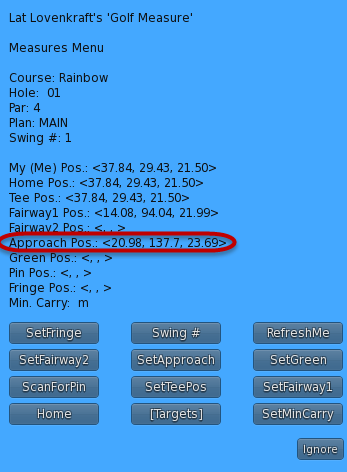
Next, we need the Pin Position. We get this by using the ScanForPin button from the [Measures] sub-menu, below.
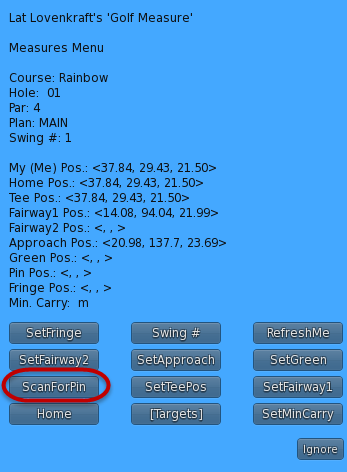
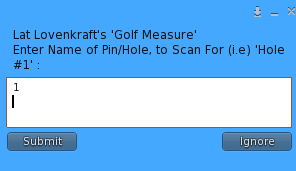
This will produce a pop-up box where we can enter either a 1 or a ‘Hole #1’ which is the actual name of the hole. We can use just the hole number because the system is smart enough to know that 1 is equal to Hole #1 for the Rainbow Course and we are within 96 meters of the hole. It turns out that from where I was at was too far from the hole for it to sense the hole name, so i needed to move closer to the hole.
[21:35:10] Golf Measure: FOUND POSITION of PIN Named: Hole #1
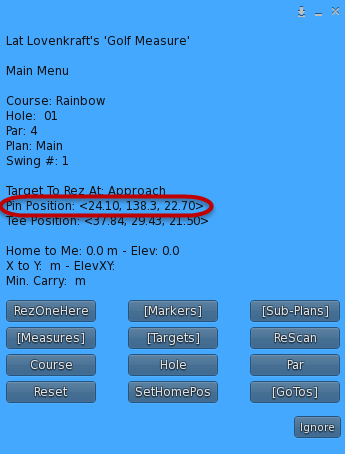
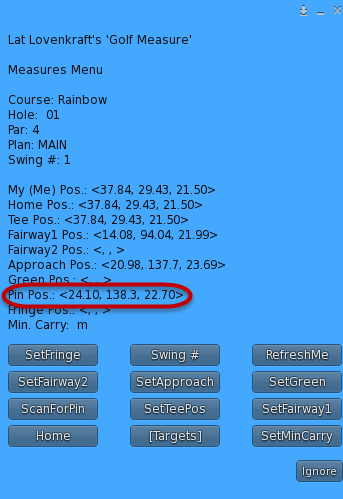
We now have all the Measures needed to save for subsequent use on this MAIN plan. (DFC). See Below.
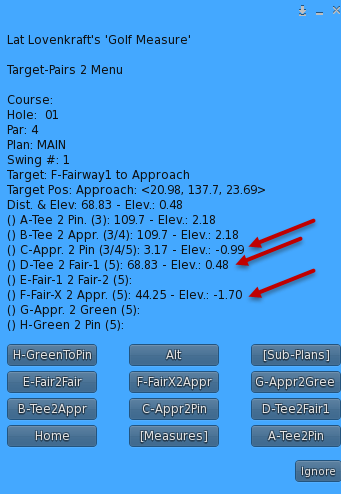
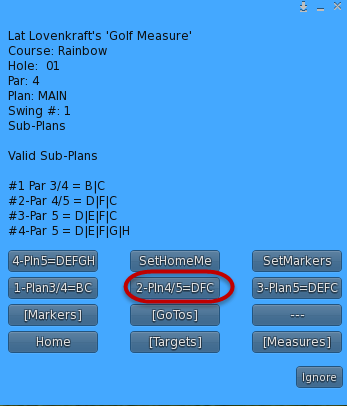
Now we find the sub-plan that matches DFC which is Sub-Plan #2.
Pressing it will save 3 records that have the positions, distances, and elevations for the 3 measures. This can now later be repeatedly retrieved from the Golf Coach HUD.
Pressing the DUMP button from the [Markers] Sub-Menu will confirm our 3 records. If there was a minimum-carry required, it would also be included at the end.
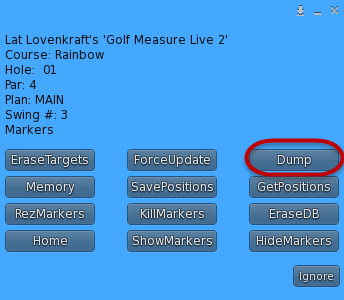
Golf Measure: TARGETRA01M1 – D-TeeToFairway1,<14.08, 94.04, 21.99>,68.84,0.49,
Golf Measure: TARGETRA01M2 – F-Fairway1ToApproach,<20.98, 137.7, 23.69>,44.20,1.70,
Golf Measure: TARGETRA01M3 – C-ApproachToPin,<24.10, 138.3, 22.70>,3.17,-0.99,
***************************************
***************************************
***************************************
GOLF COACH
If you got this far by learning how to use the GOLF COURSE, then we are now ready to use the information we gathered and saved using the GOLF COURSE HUD for our GOLF COACH HUD.
It means that we can repeatedly try different attempts with GOLF COACH for specific course/hole/swings without having to re-enter the same information again and again.
If you skipped the GOLF COURSE tutorial, it is ok. We can just learn to use the GOLF COACH as our sole tool.
We were introduced to some of the quick-access icons from the pop-out menu of the GOLF COACH, previously.

The GOLF COACH has several menus and sub-menus.
Click on the box labeled Golf Coach.
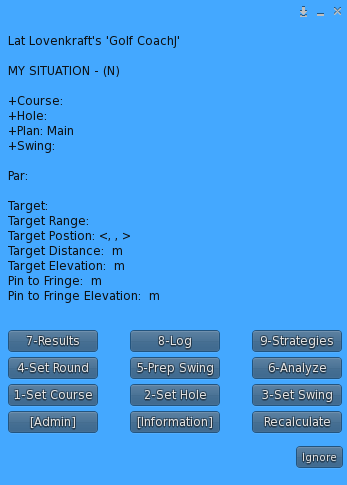
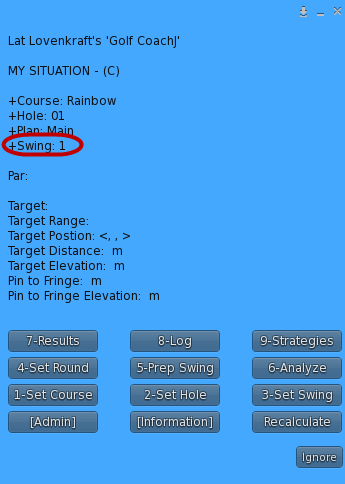
STEP 15 – Choose our Course. Click on 1-Set Course button.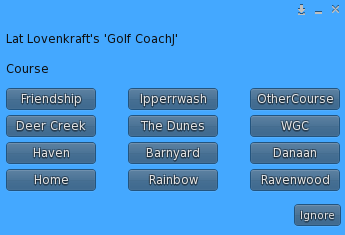
STEP 16 – Press Rainbow button
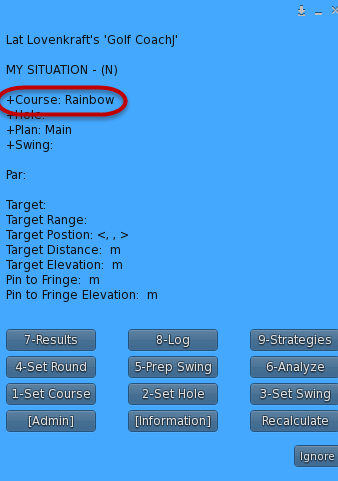
STEP 17 – Select Hole (for Hole #1) – Press 2-Set Hole button
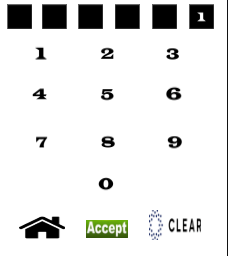
STEP 18 – Enter either 1 and press Accept button — OR — enter 01 and it will auto-accept.
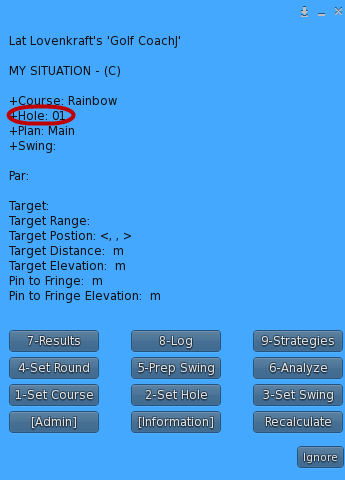
STEP 19 – Designate which SWING we are working on. This is our 1st swing, off the TEE.
We press 3-Set Swing
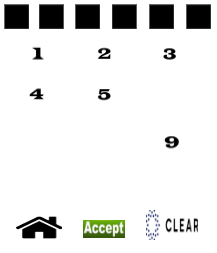
STEP 20 – Use the NumPad and enter a 1 for SWING #1.
PLANs
Insure the plan is the plan you intend to use. The 2 plans are MAIN and ALT.
We only created one plan called MAIN, but if we had also created an ALT plan in addition to or instead of a MAIN plan, then change the default plan of MAIN to ALT. To change plans, press the [Admin] button. Then press ‘Plan Alt’ button to change the plan from MAIN to ALT.
Now, if you DID create a COURSE record for Rainbow, Hole 01, Swing #1 then we can retrieve the TARGET info that has been stored by pressing the brown Co button. Assuming you did do the GOLF COURSE tutorial, lets press the Co button now.

STEP 21 – Press the Co button.
If a matching record exists in the Golf Course HUD that matches the current Course, Hole, and Swing Number, then information is sent from the COURSE HUD to the COACH HUD:
1 – Vector of Target (x,y,z) coordinates – this can be used to rez a marker (phantom, invisible, time-limited, and people-avoidance) so that the golfer can aim more precisely. It is recommended.
2 – Distance – (THIS IS THE MOST IMPORTANT value). It tells the system how far the ball should reach after the swing, factoring in wind, direction, elevation, backspin, club, etc.
3 – Par – this is informational only and can be used later to see how well your actual performance was, based on actual strokes used.
4 – Fringe distance and fringe elevation – these are advanced topics we will discuss later, that will be used to help prevent a ball from going too far past the hole/pin.
5 – Target – this is informational only and is used as a reminder as to where you should be starting from and where you should be aiming for, in general. (i.e. tee, fairway, green, pin, etc).
Example: D-TeeToFairway1
6 – Minimum Carry (Distance) – the length of any hazard for this particular swing that must be factored into the final distance calculation. You want go AT LEAST this far plus a small safety-factor which will automatically be factored in and can be re-adjusted on a configuration notecard, if need be. The COACH HUD will insure that only clubs and power that satisfy the minimum carry distance plus safety-factor will be considered as a possible solution.
Below are the results of us pressing the brown CO button on the COACH HUD in our example from COARSE HUD: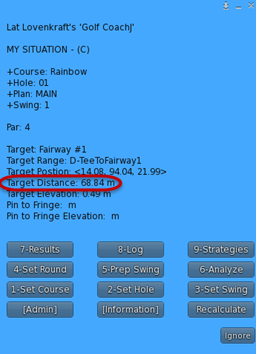
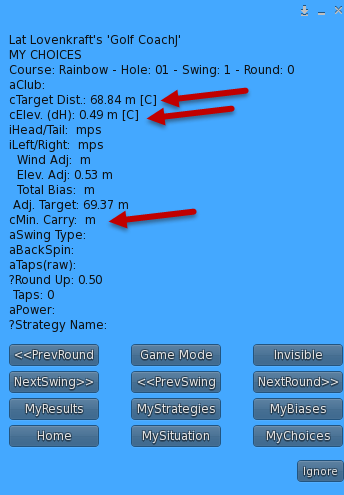
TARGET DISTANCE and ELEVATION
Now is a good time to stress the importance of these 2 most vital parameters/metrics. You can assign these 2 values from either the COURSE HUD or COACH HUD. The last HUD you use to assign these values will override any previous values. You should already know how to assign these values in the COURSE HUD if you did the COURSE tutorial. To assign these values in the COACH HUD, you will need 4 values. COURSE, HOLE, SWING, and ROUND. Once these values are set, press 5-Prep Swing from the main menu. Then press the Distance button and enter how far you want to hit the golf ball. Be sure to enter a value for the Elevation of the target as well by pressing the Elevation button on the same page as the ‘Distance.‘ button.
PAR
Before I forget, if you did not enter information into the COURSE HUD, you can enter the PAR by pressing the 8-Log button and then pressing the EnterPar button.
You start each hole from the TEE position. Other than starting the TEE position left of center or right of center, you probably do not need to be exactly positioned as you were when you created the TEE position in the COURSE HUD. But if you are anal about the position, you can simply bring up the COURSE HUD main menu and press [GoTos] button, then press GoToTee button. This will move your avatar and align you exactly where you created the TEE position.
Next, we need to tell the COACH HUD what the wind conditions are. Know that the wind and likely will change, if only slightly, between the time we enter it and the time we actually swing and hit the ball.
If you have the TG GolfCaddy HUD, you can see the current forward/backward and left/right wind speed in meters per second (mps).

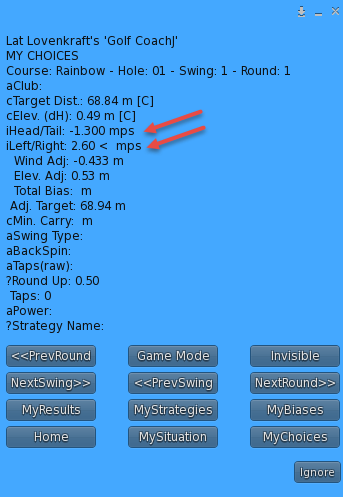
In this example above the forward/backward wind speed is 1.3 mps against you so it will slow your shot down a bit. The left/right speed is 2.6 mps so the wind will push your ball a bit to the right. These factors we must compensate for. The composite wind speed (diagonal wind direction) is 2.9 mps which does not do us any good. This compensation is what the COACH HUD is designed to help do for you when we later apply the 6-Analyzy button/feature.
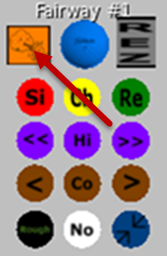
And, if you do NOT own or USE this GOLF CADDY HUD, …AND…the course is using SL Wind, you can press the WIND icon on the COACH HUD. This action will attempt to extract and calculate the wind speeds both forward/backward and left-to-right, and populate them into your COACH HUD for you. Below you will find the WIND icon is yellowish in the upper left-hand corner of the icon slide-out.
AIMING
When you are ready to AIM, the convenient REZ icon (GRAY rectangle in upper right-hand corner) will REZ a vertical white marker that will only be visible for a few seconds. It will rez as PHANTOM.
Notice that the blue arrow repositions itself to point to the pin when within reasonable range. NOTE that the marker will not rez if there is anyone else on the sim. So be aware that total GOLF COACHing is intended to be a solo endeavor so as not to hinder other players.
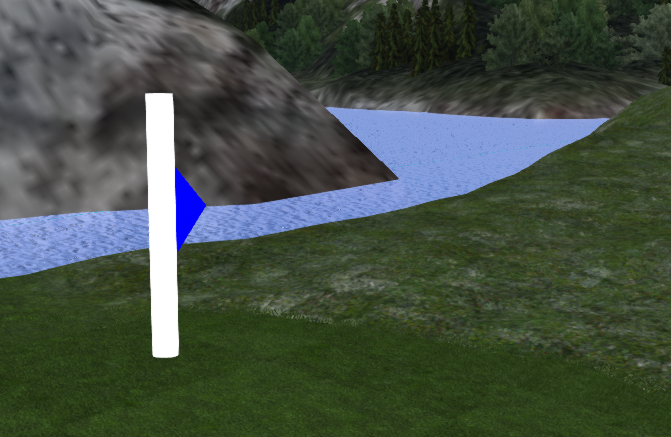
If you need to see it longer then you must make invisible objects visible by using the CNTL-ALT-T combination as an extra precaution against interfering with someone who landed on the sim after it has rezzed.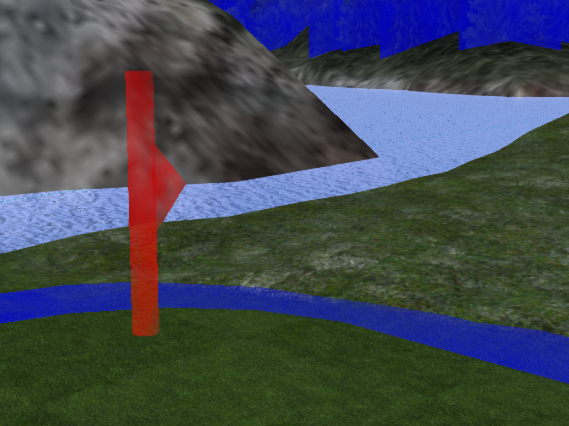

5-PrepSwing
After DISTANCE (to target), the 2nd most important factor is WIND, followed by ELEVATION. Both Distance and Elevation can be entered using the 5-PrepSwing button (if you did not enter those values using the COURSE HUD and bring the values over using the CO icon) to get to the PrepSwing menu.
Press the WindHeadTail button to enter the value of the head/tail wind vector.
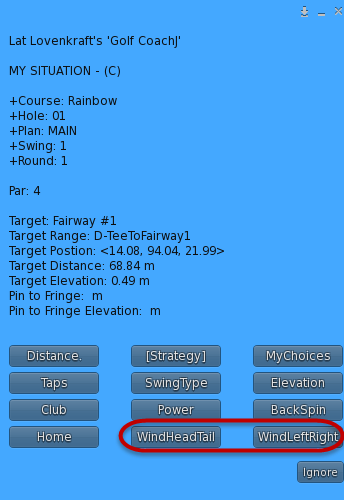
Let us use the values from our Caddy HUD, just for simplification and expediency, assuming values were not assigned using the yellowish-brown WIND icon. Of course your values will be different.

The HeadTail wind value points down so this value would become negative 1.3 so we would enter -1.3, meaning that the value would push against us and as such the wind would have an adverse effect on our golf distance.
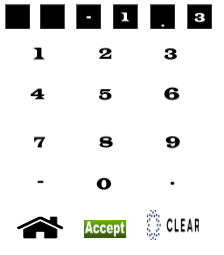
The LeftRight wind value points right so this value would become positive 2.6 so we would enter 2.6, meaning that the value would push against us to the right.
After 6-ANALYZE step, for example, a right-pointing WIND would advise a <<< AIM adjustment to compensate for the fact that the wind wants to push the ball to the RIGHT so the ADVICE would suggest a number of TAPS to the LEFT, depending upon the magnitude of the value and the ROUND instruction (i.e. how to handle the 0.6 part of the value).
After we enter the WIND values, the COACH HUD automatically calculates the adjustments for HeadTail Wind and Elevation as to how they affect the DISTANCE. We see that Wind Adj when added to Elev Adj is: -0.433 + .53 = 0.1. We add that to 68.84 = 68.94. This minute adjustment will probably not affect our outcome in this particular situation.
Bias is an advanced topic we will cover later that allows for finer adjustments to Wind and Elevation effects, based on Course and/or Course-Hole.
So Adjusted Target is what the ANALYZER will use to help determine what is needed to reach that DISTANCE target, considering: Club, Power, BackSpin, Swing-Type, Taps, etc.
The effect of LeftRight Wind will be delayed until after the 6-ANALYZE Phase. We need to consider the CLUB to determine the amount of AIM which converts into TAPS and will be adjusted by our chosen ROUND UP value.
The values on this screen preceded by a lower-case ‘a’ means these values can be determined after the 6-ANALYZE step and can automatically be inserted by simply choosing an ADVICE number as we will see later on, but essentially these are really the 5 values that you will CHOOSE in order to obtain your desired target-distance result (Club, Power, BackSpin, Taps, FullSwingOrChip. A lower-case ‘i’ and lower-case ‘c’ means we have to provide those values. ‘i’ means we INSERT those values using a MENU. ‘c’ means the values are part of the COURSE metrics and can be entered using the COURSE HUD or COACH HUD. The [C] means we brought the values from the COURSE HUD, vs entering them manually [N]’ (normal) using the COACH HUD. Values without a prefix means these are calculated internally. ‘?’ prefixes are special and means these values are special and are not required to be used or addressed.
The only value required in order to advance to the 6-ANALYZE stage is Adj. Target. It must be non-zero.
STEP 6-Analyze
Ok now for the grand pay-off. What are the best decisions to make to get closest to our target based on the Adjusted Target-Distance ?
The ANALYZE function cycles thru many if not most of the combinations of: CLUBs, POWERs, CARRYS, and BACKSPINs and offer you 1 or more choices based on the Adjusted target-distance.
While many factors are offered based on known factors, the effect of the side-wind CANNOT be determined unless/until a CLUB has been chosen. This LeftRight Aim. This is often referred to as TAPs in this HUD. Also, the optional ROUND feature determines how TAPs are rounded. The default is .50 and can be overridden on the *golfcoach notecard.
You can press an APPLY button (1 thru 9) and automatically store the selections from a particular ADVICE in your HISTORY for this COURSE, HOLE, SWING, and ROUND.
You can also OVERRIDE ANY or ALL of the recommended criteria offered from the ANALYZE function to later be stored as HISTORY using the 8-LOG function/button.
You can also ignore all of the ADVICEs. LOGging is also not required if you do not feel you will ever want to review the HISTORY of how you performed.
There are 4 major types of ADVICEs we need to familiarize ourselves with:
1 – Normal
2 – BackSpin
3 – Hazard (Carry)
4 – Rough
This is what we might get, below:
Let’s create an example, for demonstration purposes only, that is MORE interesting than just one single advice that says that to go to 60+ meters we need to use a “Driver with 100% power”, which is what it would be in our example discussed above for our 1st SWING.
Let us imagine that our target/distance is 32 meters for whatever reason.
We will enter Distance of 32 m by first pressing the 5-Swing button from the main menu. This will override the existing distance of 68.84. m Enter 32 then Accept after pressing Distance button.
Now we Press the 6-Analyze button from the Main Menu.
***************************************************************************
APPLY #1 Might I advise a Driver, NO BACKSPIN, with a POWER of: 100 %, and an ESTIMATED CARRY of: 46.00 m, for a DISTANCE of: 69.50 m, nearest to your Adjusted Target-Distance of: 69 m, with a ROLLON of: 23.50 m.
“Might I advise a” is random verbiage to add variability, less monotony, and make it more conversational. It will be random each time.
Often times there will be more than just one APPLY to choose from.
The APPLY provides all the information you need to hit the golf ball at the target and arrive WITHIN the tolerance range. This defaults to 2 meters within the target distance. This value can be changed on the *golfcoach notecard using the entry labeled MaximumDistanceFromTarget.
*********
Now, by simply changing the DISTANCE we can get different applies. Just for fun, lets do that to try and get a different outcome, mainly multiple ADVICEs.
HOME ==> 5-PrepSwing ==> DISTANCE
Now enter 32 for Distance
HOME ==> 6-Analyze
Wow, we get something similar to the following:
[09:42:47] Golf CoachkP: APPLY #1 {GT, 1.94 m, 5 Wood, 50 %, 0 +/-}
Now, it might be wise to CONSIDER: , taking a FULL-SWING with a 5 Wood, NO BACKSPIN,
with a POWER of: 50 %, a Minimum Carry of: 0 m, a Base Carry of: 39.70 m, an Adjusted Base Carry of: 39.70 m, with a Head/Tail Wind-Effect for this club of: -0.42 m, and for an UNAFFECTED DISTANCE of: 33.50 m, and an AFFECTED DISTANCE of: 33.50 m, nearest to your Adjusted Target-Distance of: 31.56 m, with a ROLLON of: -6.19 m. and a Left/Right Aim Adjust of: 0 taps, and a Rough Penalty Assigned of: 0 m
[09:42:47] Golf CoachkP: APPLY #2 {LT, 0.06 m, 8 Iron, 100 %, 0 +/-}
Now, it might be wise to CONSIDER: , taking a FULL-SWING with a 8 Iron, NO BACKSPIN,
with a POWER of: 100 %, a Minimum Carry of: 0 m, a Base Carry of: 24.20 m, an Adjusted Base Carry of: 24.20 m, with a Head/Tail Wind-Effect for this club of: -0.42 m, and for an UNAFFECTED DISTANCE of: 31.50 m, and an AFFECTED DISTANCE of: 31.50 m, nearest to your Adjusted Target-Distance of: 31.56 m, with a ROLLON of: 7.30 m. and a Left/Right Aim Adjust of: 0 taps, and a Rough Penalty Assigned of: 0 m
[09:42:47] Golf CoachkP: APPLY #3 {LT, 0.06 m, 7 Iron, 75 %, 0 +/-}
Now, it might be wise to CONSIDER: , taking a FULL-SWING with a 7 Iron, NO BACKSPIN,
with a POWER of: 75 %, a Minimum Carry of: 0 m, a Base Carry of: 28.00 m, an Adjusted Base Carry of: 28.00 m, with a Head/Tail Wind-Effect for this club of: -0.42 m, and for an UNAFFECTED DISTANCE of: 31.50 m, and an AFFECTED DISTANCE of: 31.50 m, nearest to your Adjusted Target-Distance of: 31.56 m, with a ROLLON of: 3.50 m. and a Left/Right Aim Adjust of: 0 taps, and a Rough Penalty Assigned of: 0 m
[09:42:47] Golf CoachkP: APPLY #4 {LT, 1.56 m, 7 Wood, 50 %, 0 +/-}
Now, it might be wise to CONSIDER: , taking a FULL-SWING with a 7 Wood, NO BACKSPIN,
with a POWER of: 50 %, a Minimum Carry of: 0 m, a Base Carry of: 35.40 m, an Adjusted Base Carry of: 35.40 m, with a Head/Tail Wind-Effect for this club of: -0.42 m, and for an UNAFFECTED DISTANCE of: 30.00 m, and an AFFECTED DISTANCE of: 30.00 m, nearest to your Adjusted Target-Distance of: 31.56 m, with a ROLLON of: -5.39 m. and a Left/Right Aim Adjust of: 0 taps, and a Rough Penalty Assigned of: 0 m
What we call the CRITICAL info is bounded in {}
APPLY #1 {GT, 1.94 m, 5 Wood, 50 %, 0 +/-}
APPLY #2 {LT, 0.06 m, 8 Iron, 100 %, 0 +/-}
APPLY #3 {LT, 0.06 m, 7 Iron, 75 %, 0 +/-}
APPLY #4 {LT, 1.56 m, 7 Wood, 50 %, 0 +/-}
To use this information at its basic level, simply choose the distance closest to your target. We see 1.94,, .06,, 0,06, and 1.56. So we can choose either of the 0.06 ADVICEs.
For me, it is easier for me to use 100% Power vs trying to time a 25, 50 or 75 percent power. SI might choose the APPLY #2, choosing an 8 iron. The GT vs LT means that GT targets 1.94 meters BEYOND the hole, while LT targets distances before the hole. We will talk about the verbose information later.
***************************************************************************
MINIMUM CARRY
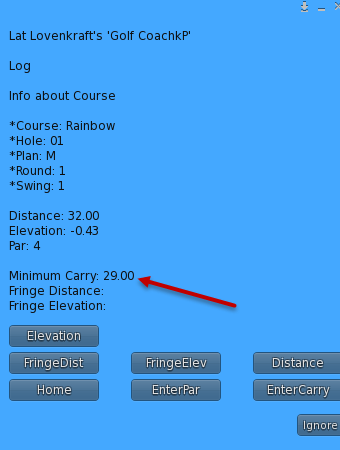
Now consider a MINIMUM CARRY DISTANCE to avoid a HAZARD. Lets pretend we need a minimum of 29 meters to clear an imagined hazard. This will be the size of the hazard in the direction between our ball and the closest point of the hazard along our line of sight. Add to this the size of the hazard measured as the distance between the closest point of the hazard to our target/pin/hole and the target/pin/hole plus the distance.
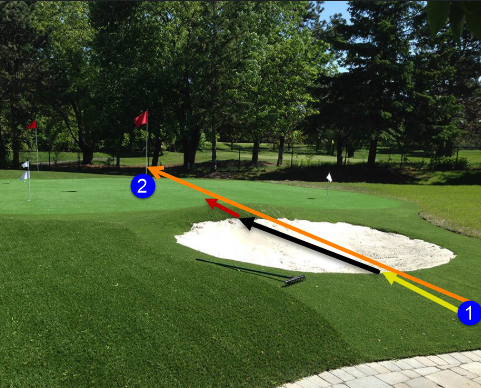
Above imagine the ball is at the 1 position. We aim for the pin/hole at the 2 position.
The carry is the distance of the YELLOW arrow PLUS the distance across the hazard, the BLACK arrow, PLUS the RED arrow that indicates the HazardSafetyMargin (default is 2 meters). The yellow arrow is from the target that should be close to 1. If your ball lands before after 1 then estimate that difference and consider it with your club choice when reviewing the ADVICEs. Or just override the Minimum Carry plus or minus based on the outcome of the previous swing.
Now when we press the 6-Analyze button, 2 of our ADVICEs are eliminated because they do not meet the Minimum Carry using the Adjusted-Carry distance. Adjusted-Carry distance can be adversely affected if we start off in a rough area or can be affected by a Head-Tail wind.
APPLY #1 {GT, 1.34 m, 6 Iron, 75 %, 0 +/-}
Might I make a SUGGESTION? Think about picking a , taking a FULL-SWING with a 6 Iron, NO BACKSPIN,
with a POWER of: 75 %, a Minimum Carry of: 29.00 m, a Base Carry of: 30.30 m, an Adjusted Base Carry of: 30.30 m, with a Head/Tail Wind-Effect for this club of: -0.42 m, and for an UNAFFECTED DISTANCE of: 34.00 m, and an AFFECTED DISTANCE of: 34.00 m, nearest to your Adjusted Target-Distance of: 32.66 m, with a ROLLON of: 3.70 m. and a Left/Right Aim Adjust of: 0 taps, and a Rough Penalty Assigned of: 0 m
[08:51:21] Golf CoachkP: APPLY #2 {GT, 0.84 m, 5 Wood, 50 %, 0 +/-}
Might I make a SUGGESTION? Think about picking a , taking a FULL-SWING with a 5 Wood, NO BACKSPIN,
with a POWER of: 50 %, a Minimum Carry of: 29.00 m, a Base Carry of: 39.70 m, an Adjusted Base Carry of: 39.70 m, with a Head/Tail Wind-Effect for this club of: -0.42 m, and for an UNAFFECTED DISTANCE of: 33.50 m, and an AFFECTED DISTANCE of: 33.50 m, nearest to your Adjusted Target-Distance of: 32.66 m, with a ROLLON of: -6.19 m. and a Left/Right Aim Adjust of: 0 taps, and a Rough Penalty Assigned of: 0 m
***************************************************************************
ROUGH
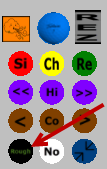
If you are swinging out of a ROUGH area, you can add the penalty into the calculation so that the Analyzer knows it needs a more powerful CLUB/POWER combination to overcome the obstruction. Simply press the ROUGH button. It will toggle to BLINKING from black to red and back. IT adds a penalty of 90 % when putting, and 10 to a driver and to Irons, and 50 % to woods. This shows up in the CRITICAL area as a pct followed by RP. Notice that the AFFECTED DISTANCE is now much different than the UNAFFECTED DISTANCE.
[19:58:33] Golf CoachkP: APPLY #1 {GT, 1.91 m, 6 Iron, 75 % PWR, 0 +/-, 10 % RP}
I would like to RECOMMEND , taking a FULL-SWING with a 6 Iron, NO BACKSPIN,
with a POWER of: 75 %, a Minimum Carry of: 0 m, a Base Carry of: 30.30 m, an Adjusted Base Carry of: 28.60 m, with a Head/Tail Wind-Effect for this club of: -0.42 m, and for an UNAFFECTED DISTANCE of: 34.00 m, and an AFFECTED DISTANCE of: 30.60 m, nearest to your Adjusted Target-Distance of: 32.09 m, with a ROLLON of: 3.70 m. and a Left/Right Aim Adjust of: 0 taps, and a Rough Penalty Assigned of: 3.40 m
[19:58:33] Golf CoachkP: APPLY #2 {GT, 1.41 m, 5 Wood, 50 % PWR, 0 +/-, 50 % RP}
I would like to RECOMMEND , taking a FULL-SWING with a 5 Wood, NO BACKSPIN,
with a POWER of: 50 %, a Minimum Carry of: 0 m, a Base Carry of: 39.70 m, an Adjusted Base Carry of: 31.33 m, with a Head/Tail Wind-Effect for this club of: -0.42 m, and for an UNAFFECTED DISTANCE of: 33.50 m, and an AFFECTED DISTANCE of: 16.75 m, nearest to your Adjusted Target-Distance of: 32.09 m, with a ROLLON of: -6.19 m. and a Left/Right Aim Adjust of: 0 taps, and a Rough Penalty Assigned of: 16.75 m
[19:58:33] Golf CoachkP: APPLY #3 {LT, 0.59 m, 8 Iron, 100 % PWR, 0 +/-, 10 % RP}
I would like to RECOMMEND , taking a FULL-SWING with a 8 Iron, NO BACKSPIN,
with a POWER of: 100 %, a Minimum Carry of: 0 m, a Base Carry of: 24.20 m, an Adjusted Base Carry of: 22.63 m, with a Head/Tail Wind-Effect for this club of: -0.42 m, and for an UNAFFECTED DISTANCE of: 31.50 m, and an AFFECTED DISTANCE of: 28.35 m, nearest to your Adjusted Target-Distance of: 32.09 m, with a ROLLON of: 7.30 m. and a Left/Right Aim Adjust of: 0 taps, and a Rough Penalty Assigned of: 3.15 m
[19:58:33] Golf CoachkP: APPLY #4 {LT, 0.59 m, 7 Iron, 75 % PWR, 0 +/-, 10 % RP}
I would like to RECOMMEND , taking a FULL-SWING with a 7 Iron, NO BACKSPIN,
with a POWER of: 75 %, a Minimum Carry of: 0 m, a Base Carry of: 28.00 m, an Adjusted Base Carry of: 26.43 m, with a Head/Tail Wind-Effect for this club of: -0.42 m, and for an UNAFFECTED DISTANCE of: 31.50 m, and an AFFECTED DISTANCE of: 28.35 m, nearest to your Adjusted Target-Distance of: 32.09 m, with a ROLLON of: 3.50 m. and a Left/Right Aim Adjust of: 0 taps, and a Rough Penalty Assigned of: 3.15 m